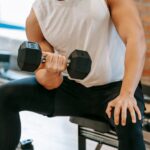
Seated rows are one of the most effective compound exercises for building a strong, well-developed back and improving overall upper body strength. Whether you’re a beginner looking to establish proper form or an experienced lifter seeking to optimize your training, this comprehensive guide will teach you everything you need to know about seated rows for back and upper arms.
This fundamental pulling exercise targets multiple muscle groups simultaneously, making it an invaluable addition to any strength training program. From proper technique to advanced variations, we’ll cover all aspects of seated rows to help you maximize your results while minimizing injury risk.
What Muscles Do Seated Rows Work?
Understanding the anatomy behind seated rows is crucial for maximizing their effectiveness. This compound movement engages multiple muscle groups across your back and arms, making it one of the most efficient exercises for upper body development.
Primary Muscles Targeted
Latissimus Dorsi (Lats)
The latissimus dorsi, your body’s largest back muscle, is the primary mover in seated rows. These wing-shaped muscles extend from your lower back to your upper arms, creating that coveted V-taper when well-developed. During seated rows, the lats are responsible for pulling your arms toward your torso.
Rhomboids
Located between your shoulder blades, the rhomboids play a crucial role in retracting your shoulder blades during the rowing motion. Strengthening these muscles is essential for maintaining proper posture and preventing rounded shoulders.
Middle Trapezius
The middle portion of your trapezius muscle works alongside the rhomboids to squeeze your shoulder blades together. This muscle group is often underdeveloped in people who spend long hours at desks, making seated rows particularly beneficial for office workers.
Secondary Muscles Engaged
Biceps Brachii
Your biceps assist in the pulling motion, particularly during the concentric (lifting) phase of the exercise. While not the primary focus, seated rows provide excellent bicep stimulation as a secondary benefit.
Posterior Deltoids
The rear portion of your shoulder muscles helps stabilize the movement and assists in the pulling motion, contributing to overall shoulder health and stability.
Erector Spinae
These deep back muscles work isometrically to maintain proper spinal alignment throughout the exercise, strengthening your core and improving posture.
How to Perform the Perfect Seated Row
Mastering proper seated row technique is essential for maximizing results and preventing injury. Follow this step-by-step guide to ensure optimal form and muscle activation.
Equipment Setup
- Adjust the seat height so your feet rest flat on the footrests with a slight bend in your knees
- Set the chest pad (if available) to support your sternum when seated upright
- Select appropriate weight – start lighter to focus on form before progressing
- Choose your grip attachment – V-handle, straight bar, or wide-grip bar depending on your goals
Step-by-Step Execution
Starting Position:
- Sit upright with your chest out and shoulders back
- Grasp the handle with both hands using a neutral grip
- Plant your feet firmly on the footrests
- Maintain a slight forward lean from your hips (not your back)
- Keep your core engaged throughout the movement
The Pull Phase:
- Initiate the movement by squeezing your shoulder blades together
- Pull the handle toward your lower chest/upper abdomen
- Keep your elbows close to your body as you pull
- Focus on driving your elbows back rather than just pulling with your hands
- Pause briefly when the handle reaches your torso
The Return Phase:
- Slowly control the weight back to the starting position
- Allow your shoulder blades to separate naturally
- Maintain tension in your back muscles throughout the eccentric phase
- Stop when you feel a comfortable stretch in your lats
Breathing Technique
- Exhale during the pulling phase (concentric contraction)
- Inhale during the return phase (eccentric contraction)
- Maintain steady breathing throughout the set – never hold your breath
Seated Row Variations for Different Goals
Diversifying your seated row variations can target different muscle groups, prevent plateaus, and keep your workouts engaging. Here are the most effective variations to incorporate into your training.
Wide-Grip Seated Row
The wide-grip variation shifts emphasis to your middle trapezius and rhomboids while still engaging the lats effectively.
How to Perform:
- Use a wide-grip lat pulldown bar attachment
- Grip the bar with hands wider than shoulder-width
- Pull the bar to your upper chest/lower neck area
- Focus on squeezing your shoulder blades together
- This variation is excellent for improving posture and targeting the often-neglected middle back
Single-Arm Seated Row
Unilateral training helps address muscle imbalances and improves core stability.
Benefits:
- Identifies and corrects strength imbalances between sides
- Increases core engagement for stability
- Allows for greater range of motion
- Enables focus on one side at a time for better mind-muscle connection
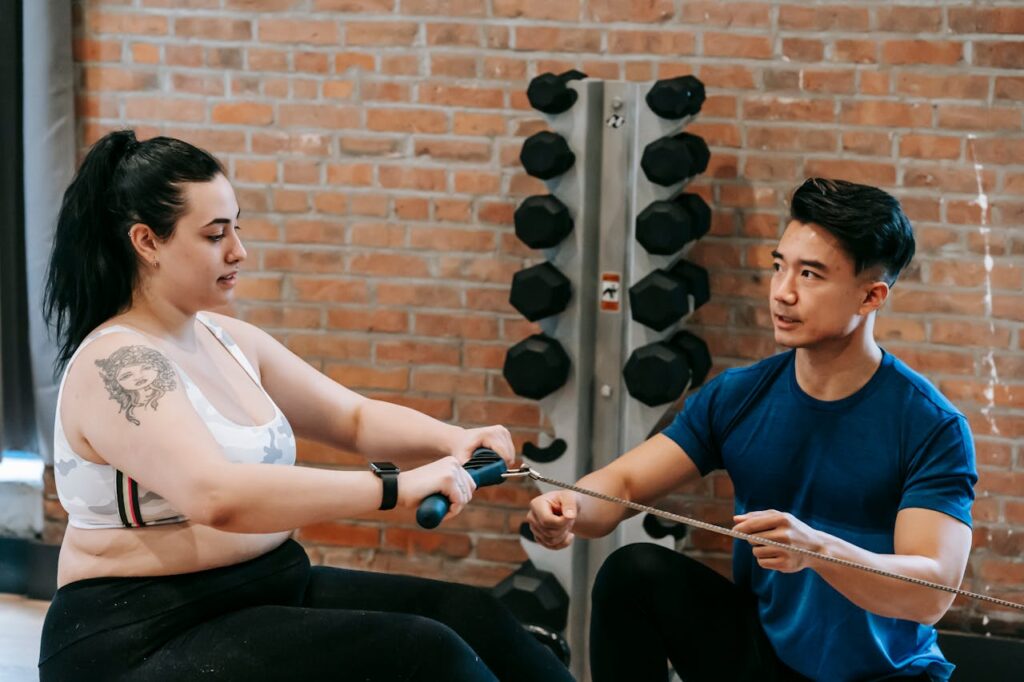
Resistance Band Seated Row
Perfect for home workouts or when gym equipment isn’t available.
Setup and Execution:
- Anchor a resistance band at chest height
- Sit on the floor or bench with legs extended
- Perform the same rowing motion as with cable machines
- Adjust resistance by changing band tension or using different band strengths
High Row Variation
Targeting the upper back and rear deltoids more specifically.
Technique Adjustments:
- Set the cable attachment higher than chest level
- Pull toward your upper chest/neck area
- Keep elbows slightly flared outward
- Excellent for balancing pressing movements and improving shoulder health
Programming Seated Rows: Sets, Reps, and Frequency
Proper programming is crucial for maximizing the benefits of seated rows while allowing adequate recovery. Your approach should vary based on your specific goals and training experience.
For Strength Development
- Sets: 3-5 sets
- Reps: 3-6 reps
- Rest: 2-3 minutes between sets
- Load: 80-90% of your 1RM
- Frequency: 2-3 times per week
For Muscle Growth (Hypertrophy)
- Sets: 3-4 sets
- Reps: 8-12 reps
- Rest: 60-90 seconds between sets
- Load: 65-80% of your 1RM
- Frequency: 2-3 times per week
For Muscular Endurance
- Sets: 2-3 sets
- Reps: 15-20+ reps
- Rest: 30-60 seconds between sets
- Load: 50-65% of your 1RM
- Frequency: 3-4 times per week
Progressive Overload Strategies
- Increase Weight: Add 2.5-5 pounds when you can complete all sets with perfect form
- Add Volume: Increase sets or reps gradually
- Improve Time Under Tension: Slow down the eccentric phase
- Decrease Rest Periods: Gradually reduce rest time between sets
- Advanced Techniques: Incorporate drop sets, pause reps, or cluster sets
Common Mistakes and How to Fix Them
Avoiding these frequent errors will help you get better results and reduce injury risk.
Mistake 1: Using Too Much Weight
The Problem: Ego lifting leads to poor form, reduced range of motion, and increased injury risk.
The Fix:
- Start with lighter weight and focus on perfect form
- You should be able to control the weight throughout the entire range of motion
- Quality over quantity – proper form trumps heavy weight every time
Mistake 2: Rounded Back Posture
The Problem: Allowing your back to round puts excessive stress on your spine and reduces muscle activation.
The Fix:
- Maintain a neutral spine throughout the movement
- Keep your chest up and shoulders back
- Engage your core to support proper posture
- Consider reducing weight if you can’t maintain good posture
Mistake 3: Excessive Forward Lean
The Problem: Leaning too far forward at the start position can strain your lower back.
The Fix:
- Maintain only a slight forward lean from your hips
- Keep your torso relatively upright throughout the movement
- Focus on the rowing motion rather than using momentum
Mistake 4: Incomplete Range of Motion
The Problem: Not fully extending or contracting limits muscle development and strength gains.
The Fix:
- Allow for a full stretch at the starting position
- Pull the handle all the way to your torso
- Focus on the squeeze at the top of the movement
Mistake 5: Neglecting the Eccentric Phase
The Problem: Letting the weight slam back reduces muscle stimulation and increases injury risk.
The Fix:
- Control the weight during the return phase
- Take 2-3 seconds to lower the weight
- Maintain tension in your back muscles throughout
Safety Tips and Injury Prevention
Implementing proper safety measures ensures you can continue training effectively while minimizing injury risk.
Pre-Workout Preparation
Dynamic Warm-Up:
- Arm circles and shoulder rolls
- Band pull-aparts
- Light rowing movements without weight
- Thoracic spine mobility exercises
Activation Exercises:
- Scapular wall slides
- Band-assisted shoulder blade squeezes
- Light lat pulldowns or assisted pull-ups
During Your Workout
- Start Light: Always begin with lighter weights to prepare your muscles and joints
- Focus on Form: Never sacrifice technique for heavier weight
- Listen to Your Body: Stop if you experience pain or unusual discomfort
- Stay Hydrated: Proper hydration supports muscle function and recovery
Post-Workout Recovery
- Cool Down: Light stretching focusing on the lats, rhomboids, and chest
- Foam Rolling: Target your upper back and lats to improve recovery
- Adequate Rest: Allow 48-72 hours between intense back training sessions
Integrating Seated Rows into Your Workout Program
Seated rows work best when properly integrated into a balanced training program. Here’s how to incorporate them effectively.
Back-Focused Training Day
- Deadlifts or Rack Pulls (compound movement)
- Seated Rows (horizontal pull)
- Lat Pulldowns or Pull-ups (vertical pull)
- Face Pulls (rear delt focus)
- Barbell or Dumbbell Rows (additional horizontal pull)
Upper Body Push/Pull Split
Pull Day Example:
- Pull-ups or Lat Pulldowns
- Seated Cable Rows
- Single-Arm Dumbbell Rows
- Face Pulls
- Bicep Curls
- Hammer Curls
Full Body Workout Integration
Include seated rows as your primary horizontal pulling movement, balancing it with:
- A vertical pull (pull-ups/lat pulldowns)
- A horizontal push (bench press/push-ups)
- A vertical push (overhead press)
- Lower body compound movements
Troubleshooting Form Issues
Different body types and mobility limitations may require specific adjustments to optimize seated row performance.
For Tall Individuals
- May need to adjust seat height more significantly
- Consider using a longer range of motion
- Focus on maintaining proper posture throughout the extended range
For Those with Limited Shoulder Mobility
- Start with a narrower grip
- Use a neutral grip handle when possible
- Incorporate shoulder mobility work into your warm-up routine
- Consider working with a qualified trainer to address mobility limitations
For Beginners
- Start with resistance bands or very light weights
- Focus on learning the movement pattern before adding load
- Consider working with a trainer for the first few sessions
- Progress slowly and prioritize consistency over intensity
Frequently Asked Questions
How often should I do seated rows?
For most people, performing seated rows 2-3 times per week allows for optimal muscle development while providing adequate recovery time. Advanced trainees might benefit from higher frequencies with varied intensities.
Can I do seated rows if I have lower back problems?
Seated rows can actually be beneficial for lower back health when performed correctly, as they strengthen the supporting muscles. However, if you have existing back issues, consult with a healthcare provider or qualified trainer before beginning any new exercise program.
What’s the difference between seated rows and bent-over rows?
Seated rows provide more stability and support, making them safer for beginners and those with lower back concerns. Bent-over rows require more core stability and engage additional stabilizing muscles but may be more challenging to perform correctly.
Should I feel seated rows in my biceps?
While your biceps will assist in the movement, the primary focus should be on your back muscles. If you’re feeling it predominantly in your biceps, you may be pulling with your arms rather than initiating the movement with your back muscles.
How do I know if I’m using the right weight?
You should be able to complete all prescribed repetitions with perfect form while feeling challenged on the last 2-3 reps. If you can’t maintain proper form throughout the set, the weight is too heavy. If you could easily do 5+ more reps, it’s too light.
Conclusion: Building a Stronger Back with Seated Rows
Seated rows are an invaluable exercise for developing back strength, improving posture, and building a well-rounded physique. By mastering proper technique, incorporating appropriate variations, and following smart programming principles, you can maximize the benefits of this fundamental movement.
Remember that consistency and progressive overload are key to long-term success. Start with perfect form using lighter weights, gradually increase the challenge as you become stronger, and always prioritize quality over quantity.
Whether your goal is building muscle, increasing strength, or improving posture, seated rows deserve a prominent place in your training program. Combined with other pulling movements and a balanced approach to training, they’ll help you develop the strong, healthy back you’re working toward.
Ready to transform your back training? Start incorporating these seated row techniques into your next workout and experience the difference that proper form and programming can make. Your future self will thank you for the investment in building a stronger, more resilient back.